Saturday

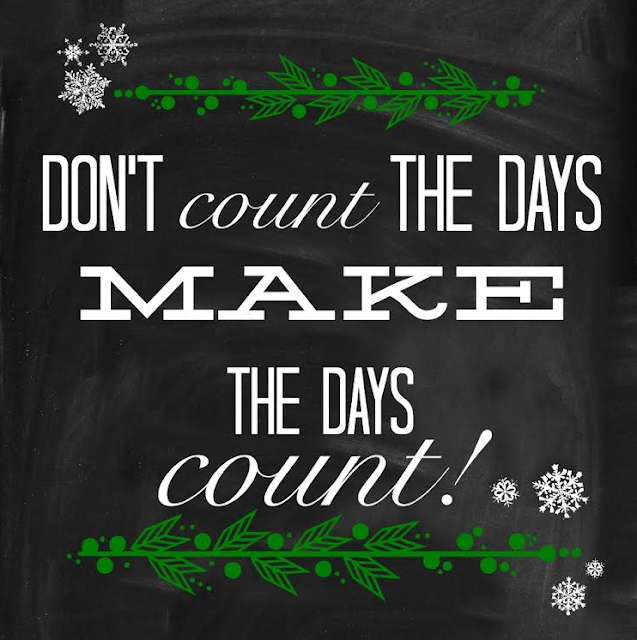
Make it count- a FREE printable

 12.2..13-


  Tis' the Season friends.  I'm sure countdowns are well underway at your homes.  Before we get to busy in just counting down, turning over pages, opening up little compartments let's remember to take the time & enjoy the most of each day. I created this printable hoping it will help me to celebrate each day I get to spend with my family & friends until Christmas day arrives instead of just counting down the days.


-created this using the fabulous Rhonna Designs app-


As a little gift from me to you this Holiday Season. 
You can print one out for yourself - HERE.

Here's some ideas of how to put it to use in your home. 
I printed it out, clipped to a painted clip board, added a ribbon & tied some jingle bells on to make it festive & placed it in a spot where everyone could see it each day.   I purposely set it in front of my calendar so I would remember to make each day count! 


This wooden crate is right in central station of our house.  Everything that gets planned or organized goes through this area so it's the perfect reminder of what's important this time of year. 


Another idea is to print it out & place in on your fridge or magnet board. Hung up with festive & cute H&H Christmas magnets of coarse. 
{If you want to order a set email me & let me know.  Makes a great friend or stocking stuffer. Only $7 for a pack of 6}


Hope you enjoy this printable. 
{H}appy {H}olidays
from Hollyhocks & Honeybees.


Excited to bring some GIVEAWAYS to you, take you on a Holiday tour around decked out Lilac Lane &
much, much more!
{I love this time of year!} 

{M}

Monday

H&H In the house - Giveaway!

11.25.13- 

 With Thanksgiving right around the corner I think it's a good time for a "GiVE"AWAY!! 
{don't you?} 

This is geared to all my faithful H&H customers & The Hive shoppers.  During The {Holiday} Hive I had so many people tell me that they love having the products I make in their homes.  So it got me thinking.... I'd love to see how you decorate with H&H in your house.  

So..... here is the deal.  All you have to do is take a picture {or two} of something, anything H&H that you have up in your home right now.  It can be everyday, holiday whatever. Email me the pics to me at honeybee58@gmail.com
by this Wednesday the 27th. 
{Don't wait!} 

  One lucky person will be drawn & receive this charming 5x7 H&H  Holiday frame. I can see it now... set up on the shelf with this year's family Christmas picture tucked inside. 
{a $28 value}


-A close up of the festive color scheme-


Winner will be announced on Monday.  Grab your camera & start taking photos & send them in. I'd love to see H&H up in your home.  


-Good Luck & Happy Thanks"giving"-

{M} 
  

Friday

I'm addicted!

11.22.13- 

Finally getting around to straightening up, cleaning out & organizing my craft room. Oh, boy!  It gets a little messy & cluttered when there is a Hive approaching.  I like the feeling of getting rid of stuff that I haven't used in awhile & putting things out in a new way & give them a fresh life. 

I may or may not have a problem.... I'm addicted to letters of all shapes & sizes.  I call it an Obsession Collection 
{Anyone out there have those? } 


The best part about my collection is that I use them all the time when I create things for H&H.  Some of them have been with me a long time & others I might have found last week.  They are just so fun!  I like finding ways to store them that are unique too.  Yep, those Scrabble tiles are in an old honey jar that I purchased at The {Fall} Hive. It was just to perfect not to buy it.  


All these letters are stored in a really cool old metal drawer I found years ago.  I love all the little compartments that can hold all my ABC's.  The square metal letters have been with me the longest & the Boggle cubes are my latest vintage find. I am giddy about them.  Just so cute! 

So grateful there are things I enjoy collecting & that I appreciate in this amazing world of ours.  As many of you know I have too many collections to count & I like it that way.  Keeps me always looking & makes every shopping trip an adventure. What do you like to collect?  
-Maybe I'll share another Obsession Collection of mine again with you soon.- 

{M}   

Thursday

I always say.....

11.21.13- 
-A philosophy I shared when I spoke earlier this month on Creating a Beautiful Decorated Life
One of my favorite ways to decorate our home for any kind of occasion or celebration is to set something up on a cake stand.  They aren't just for cakes my friends! 
{Although.. whenever a cake is baked in our house, it is served on a cake stand. Looks so much prettier that way} 

Here is an example of what I mean.  
I just can't {never have been able to} decorate for Christmas before Thanksgiving.  Part of the reason why is my love for pumpkins.  I simply adore them!  I want to give them every little bit of glory they deserve.  Here is a display I have up inside our home right now. 


 Don't forget to show them off in a unique way outside too. Here they are all served up so pretty {on our little porch} set up on cake stands & placed in a bucket. 
-A snowy, dreary day at my house-
So much cuter than just plopped onto the cold cement.  I think they add a certain sophisticated flair as we anticipate Thanksgiving next week.   They seem to say that something special is about to happen & be celebrated.  


-I want to hear from you!!-
Do you still have pumpkins out at your house?  Or have you already started to deck the halls? 


Have a wonderful day! Thanks for stopping by.

{M} 

Monday

A re-cap of The {Holiday} Hive

11.18.13-

  Happy Monday everyone!  Can't believe it's the middle of November already & The {Holiday} Hive has come & gone.  WoW, what a show!  Thanks to everyone who came.  I hope you walked away with something fun to put in your home.  That really is my intention when I host a Hive.  To bring in quality one of a kind, unique handmade items.  

Ok, can I just say that I adore this picture!  Grateful to my husband for putting up a spotlight to shine onto The Hive sign for everyone to see.  
{Just for the record I don't like these dark winter hours so early} 
Seeing this opening night made me feel a little better about the dark winter ahead. 
-The Hive sign,pumpkins & pine on display for all to see- 
Could not believe when I opened the door at 6 to see a line full of ladies {& a few guys}  from my porch all the way out to the street.  Eeeeeee!  You guys made me so happy!!  Thank you, Thank you!  I love that so many enjoy coming to The Hive each time & that you arrive early to get in line- always so thrilling! 
-Loved the pumpkins & pine theme I went with this time around.  Kept it simple but yet festive at the same time- 
I always take a pic of my island right before everyone comes in.  Loved the mix of textures, colors & elements this time around.  A really casual yet elegant feel to the whole pumpkins & pine theme. 

I've mentioned before that after each Hive I sit down & jot some thoughts & ideas I've had.  Things to improve on & ways to make The Hive better.  One lesson I learned & wanted to improve on was cut down the checkout line on opening night so this time we had 2 separate checkouts.  It worked out great.  Hope you enjoyed it too.  


The reason it went so well was because of the amazing support staff I had that came & helped me.  So grateful to have amazing friends in my life who I can count on to help me out & have a great time doing it too.   Thanks so much- Amanda, Terra, Erika, Dennette & Staci.  You guys RoCk! 

- A peek into the Cash & Check check out area. Terra ready to ring people up!  Amanda ready to bag up the goods. Something else new & different this year was having everyone exit out through the "friends & family" door.  Kind of fun!-
*not to mention how many people went out the door, made a left & came right back in the front door to shop some more- so funny!!*
-A few happy shoppers with bags of goods heading home. Kind of magical getting to turn the Christmas lights on that night too- 
-These 2 operated the Credit Card line like pro's!  Adore these lovely ladies! Thanks Erika & Dennette- 
I have to give a shout out to my awesome vendors who share their creativity & amazing goods at The Hive.  Here I am with 2 of them- Tausha {SassyStyleRedesign} & Nicole {Leila Bird}  Not only were they here supporting me & dropping in The Hive every day.  They brought in new goods each day too.  So rest assured that The Hive is re-stocked each day.  It's not only opening night that just has the good stuff, trust me.  Thanks friends!!  

 I'm always so touched at the support of my family & friends from near & far who come to The Hive.  Love having people that came from down the street, around the corner or traveled as far away as Draper, SLC, Brigham City{even in the snow!} & Logan just to name a few places.  Had to get a pic of my Mom, sisters & our dear family friends who came all the way from Lewiston.  They come every time & I'm so appreciative of their support.  
{LOVE!!} 


Just had to take a pic of a shopper on SKYPE, yep The Hive welcomes virtual shopping.  Thanks Lindsey for Skyping in & for your cute sister who carried you around all night.  


Here are just some pics I snapped of The {Holiday} Hive after all the vendors had set up during the day.  Really some incredible & unique things.  I always love the energy of creativity that fills up each & every Hive. 
{Thanks vendors!!} 


Again, thanks so much for coming to The Hive.  It is always so fun to organize & anticipate every time but is always over & gone so quickly.  The next Hive will be in the Spring so stay tuned for more info. as it gets closer.  I'm taking the winter months off to focus on my long to-do list & big plans for my business. 
{I'm excited!!} 

 *If you couldn't make it to The Hive don't worry, I'm taking lots of left over things to Whisperwood & Co. with me today. So stop by & shop H&H on Main Street in Bountiful at 88 South Main. 

-Have a fabulous week everyone!- 

{M}  

Saturday

So Sweet!

11.16.13- 


  Still "BuZZed"  from a terrific Hive & wanted to hop on the blog to say THaNK You to everyone who came by, I really appreciate your support & friendship. 
----------------------------
I had the sweetest comment said to me on Thursday as I was checking out a customer at The Hive.  She said to me, " I think you should write a cookbook."  She kind of caught me off guard a bit with that statement. I said, "Oh, I don't know about that." & then she said, "Well I think you should."  How sweet is that!  Her comment made my day {got me thinking a bit too} & filled up my bucket for sure!  So kind of her.  Thanks, {T}! I love sharing things with you on this blog that I love to make. I'm glad my readers enjoy what I share. It makes me happy to hear from all of you too. 
---------------------------------
If I did ever write a cookbook this recipe would be one of the first that I would include- it's a family favorite & the perfect thing to make on a wintery, snowy day like the one we had today.  Winter is here, I think! 

-Just pulled this out of the oven, it smells heavenly!!-  
If you haven't tried this yet- you should!  The perfect thing to make & eat on a Sunday afternoon.
{Just a thought ;)} 


Sweet Petal Roll 

Scald:  1  1/2 C. milk 
Add to warmed milk:
        6 T. shortening 
        1 T. salt 
        4 T. sugar
Cool & add: 5 cups of Flour 
Dissolve 2 T. yeast in 1/2 cup warm water. Let rest a few minutes & then add to dough mixture & knead for 5 minutes 
Let raise for 1 hour. 

After dough has risen melt 1 cube of butter & place into a shallow bowl.  In another shallow bowl combine 1 c. Sugar, 2 T. Cinnamon, 1/2 C. Brown Sugar. 

Rip off a ball of dough & roll into a worm shape, about 6- 8 inches long. Dip into butter & then into sugar mixture.  Put them round & round in a pizza pan. {or you can divide the dough & make 2 -9 inch rounds}  *if you have extra dough after making the petal rolls, just roll a piece of dough into a ball, toss in the butter & sugar & then place them in a muffin tin to bake while the rolls are still raising.  {I usually get about 5-6 cinnamon balls when I use the 9 inch cake rounds} 

Raise for 45 minutes, pre heat oven to 350. Bake for 20 min & then ice with a powdered sugar glaze {powdered sugar, milk & vanilla}


Enjoy!
{M} 

News flash!!


11.16.13- 

  All remaining H&H frames in The {Holiday} Hive have been marked down for today only!  
They make a perfect gift or a great way to decorate your home for the Holidays ahead.  

Come in & take a look at the selection of amazing things in The Hive.  
10-2 today 
-4011 Lilac Lane in Mt. Green- 
-That stripe-y frame is so festive!  Would you look great with a black & white family photo tucked inside.  The little frame with the tree print is one of my fav's too!- 

Lots of candy still on hand!  Yep, I made sure I would have plenty for my Saturday shoppers.  Come in & grab a bag {or 2 or 3}  you won't be sorry, I promise.  So good! Not to mention fabulous candy jars & those giant chalkboards - LoVE! 

-Hope to see you today!- 

{M}

Wednesday

Decoration inspiration

11.13.13- 


  Busy setting up for The {Holiday} Hive but I wanted to take a minute & share something. I talked about this in my decorating class a few weeks ago & it's a good rule of thumb to follow.  When planning or setting up any kind of party, celebration or event you need to have a theme in mind.  
{First & foremost- it's a great way to start!} 

I've chosen the theme of Pumpkins & Pine for my decor at The Hive this time around. Since we're in between seasons I thought this would tie everything together nicely.  

Don't you love it when something unexpected inspires you?  It might be something you use right away or you might store it in your head to pull out & use for a later time.  Well.... that time for me is now!  

If you're a follower, reader or stalker {I know there are some of you out there!}  of my blog you might remember me telling you about a trip to No. Carolina last year & being inspired by what I saw on the steps of an antique store in Aberdeen.  

-If you want to read more of my blog post about this trip go {HERE}- 

As I was planning for The {Holiday} Hive I thought back to this picture.  I'm so not ready to toss away the pumpkins still on our porch. This is a way I can give them some new life & still embrace the wee little bit of Fall that's left while looking forward to The {Holiday} Hive & Christmas in the air.   

Ok, back to setting up, {It really is my favorite part!} cleaning the house & tying up any last minute details that need to be done &there always is. Can't wait to show you all the finished pics of everything! 

Hope to see you at The {Holiday} Hive. 
Tomorrow night 6-8 p.m. 
Friday 10-3
Saturday 10-2 
-4011 Lilac Lane in Mt. Green- 

{M} 

Tuesday

Sneak peek!

 11.12.13- 

  Wow, just realized what date it is as I typed that. Pretty cool!  Hope you all have a fabulous day today with a date like that.  It doesn't come around too often- live it up!!  

Just wanted to check in quick with a Sneak Peek at what H&H will be bringing to The {Holiday} Hive this week.  This is just the tip of the iceberg... so much more where this came from.  Excited to see all the wonderful things each vendor brings along with them too.  


*Don't forget to check out #thehiveboutique on Instagram for lots of sneak peeks from the vendors & I.  


Hope to see you in The Hive this week. 
Thursday 6-8 p.m. 
Friday 10-3 
Saturday 10-2 

{M} 

Friday

DIY- Glittery gold banner & Fall decor

11.8.13- 


Hello... everyone.  Glad to be back with another fabulous blog hop, this time around everything sparkly & shimmery gold!  


Ashley and Meegan @ Flats to Flip Flops- Gold Godess 
Emily @ Benson Street - Gold Bud Vases
Kaylynn @ Among the Youngs- Ooey Gooey Salted Caramel shortbread bars
Candice @ She's Crafty - Gold Leaf Art
Adrienne @ Free Time Frolics - Gold Tinted Mercury Glass
Andie @ Maybe I Will - Golden Memories Display
Rebecca @ the Crafted Sparrow- Gold Wishbone Necklace

If you look around gold is everywhere it seems like these days.  It's made a real comeback.  I embraced the trend by setting up my kitchen Fall display themed with a couple of gold accents this month. 


Wanted to show you how I made the triangle gold banner that I strung up. So easy to do! 


-How to make a gold fringe garland with some edge!- 

1. I left the garland attached to the packaging so it made it easier to cut through {a-ha!} & it kept all the garland intact. 


 2. I cut of 1/2 of the inner cardboard packaging so I could more easily cut through the glitter strands but still had something firm to hold onto to cut. 

3. I lined up my ruler to the center point & outside edge of the triangle I wanted to create.  

4.  Just start cutting!  I had to push fairly hard to get through all the layers & strands but it worked! Once that side was done I just repositioned my ruler to the center again & lined up the other outside edge of the triangle. 


 5.  Ta-Dah A fresh, updated gold garland with some future gold confetti strands to use later. {Bonus!}   
To finish it off, hold up the garland & give it a "hair cut" with a pair of scissors.  Cutting off some loose long strands & trimming it up a bit.  


Love how the rest of the display underneath the glittery gold garland turned out.  


I set it all up on my new "creeper"  I told you about in the last post.  So glad I spotted it antiquing this Saturday & brought it home with me.  It really is the perfect size for a centerpiece to be placed on in the center of my kitchen island.   I started with going outside & cutting some branches & berries in the yard.  Stuck them up in some of the pop bottles from my collection & then added this shimmery bottle coated in gold glitter just for the fun of it.  
-The vintage .5 price tag represents the 5 in our family- 
- How to make your own glittery bottle- 

I simply poured a good amount of Modge Podge into the bottle, turned it around & around until the entire bottle was coated.  Once completely coated, I turned the bottle upside down for the excess glue to drain out.  
{*this step is a MUST! If you don't do it the glue w/the glitter will all clump & sink to the bottom of the bottle} 
When you fill like the majority of the excess glue has come out, but the bottle is still coated, pour gold chunky glitter inside the bottle.  Turning it around & around again until it's completely coated with glitter.  Let stand & dry. Takes a day to completely dry & for the glitter to shine.  Makes for a fun accent to a centerpiece. * Just remember you can't fill them with water to put flowers in or the glue won't stick. 
{Made up a bunch this summer & used them for Miss Mace's Golden Birthday Party- so fun!} 


An ariel shot of the creeper holding lots of Fall-ish goodies.   Love this time of year, great colors, fun things to decorate with & celebrating all mother nature has to offer.  Enjoy it all before the snow starts to fly. 

{M}